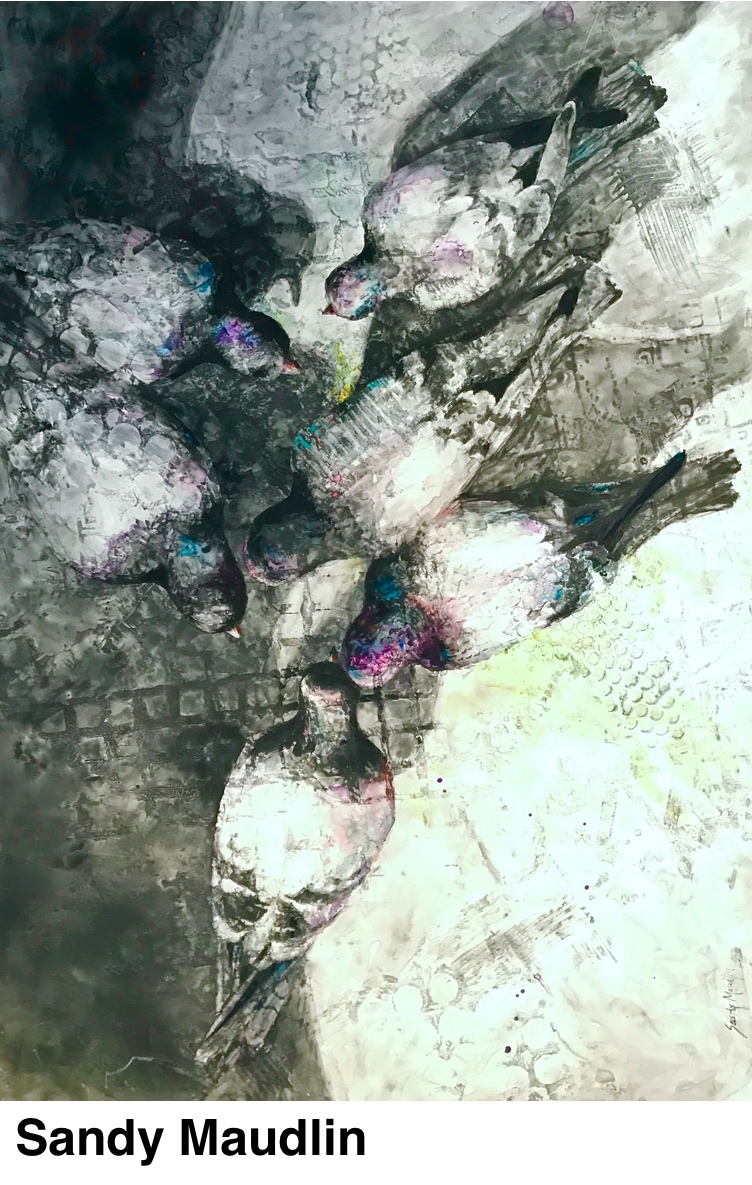
7/14/09

ADJUSTMENTS

Batik adjustments are easy enough to make once the wax is removed and the batik is adhered to either canvas or acid free watercolor paper. The posts here show the final result first, along with the stages the batik went through after I'd ironed the wax out of the rice paper. This was one of the demos done for the Craftsummer Workshop which I taught a couple of weeks ago at Miami University.

This final painting, posted first, shows the many value changes as well as color and shape adjustments, compared to the original, shown next. The artists at Craftsummer only saw the batik as seen below, with the warmer overall temperature and paler border.

I'd planned for a cool temperature painting with a warm focal area, but that just didn't happen. Many adjustments had to be made to improve the painting, and I decided I'd rather sacrifice some of the batik effect, if I had to, in order to pull off a better painting.

The window in the upper left and the archway in the lower right really needed help, as did the strength of the shadows on the steps. I also wanted to add some cool teals and turquoises to the warm areas to help alleviate the heat of the painting.

The corners all needed to be darkened to help 'enclose' the painting, but even after doing that, I felt that it still lacked depth. Darkening the border considerably and minimizing the diamond shapes in it helped give the painting a better sense of depth - - - compare first pix with third one - shown here with lighter border.

My original photo, below, shows the scene that inspired this batik, but I used lots of artistic license to create a better composition. My goal was to capture the feelings I had while we were in this incredibly beautiful little village. I left Linda out of the painting and wondered later if the painting might have been more interesting if I had included her. Too late now, though.

A close up of the focal area shows details of the temperature changes - last pix posted here - as well as the stronger colors added for the flower areas. There were really a lot of adjustments on this batik, but not as many as on the one I'm working on now.

During one of the last days at Craftsummer, I was painting hot wax on this batik to completely cover the whole sheet of rice paper. Suddenly, I realized I had my other batik-in-progress UNDER this one. Where I'd just added the hot wax, it soaked into that underlying rice paper batik-in-progress.

A couple of the artists helped me carefully pull the two pieces of waxed rice paper apart, and now I must iron off all that 'mistake' wax on that bottom batik. YIKES! Once I re wax the shapes, I hope I can continue that batik and pull it off. We'll see.....

Batik is an intense process that's very time consuming, but well worth it. I won't give up on that batik-in-progress yet, since I already have a lot of time invested in it. If it doesn't turn out, I'll still have some beautiful pieces of colored rice paper to use for collage later.

Finished Painting at Top of Post ---
"COMO COUNTRY" Transparent Watercolor Batiked with Hot Wax on Kinwashi, with Sumi Ink, mounted on Wrapped Canvas 18 x 24"

Detail of focal area

7/10/09

GREAT ART & NEW FRIENDS

Teaching a five day workshop is invigorating and fulfilling for me, (as well as exhausting.) As a teacher, I get to watch wonderful, creative artwork being born as well as get to know some fascinating and often unusually talented artists. The supplies we use and the techniques we employ give us similar vehicles to uniquely express who we are as artists.

Each person's use of color, line, shape, and texture is different from the next. Approaches varied for each assignment, and the results were stunning. Some of the batiks were over two feet long, but most were between 12" and 18".

Batik is an intense method of creating art using hot wax to preserve shapes. We all learned from each other, from our successes and from our failures.

It seems that each painting expresses a special part of that artist in a way that only she can express. The happy accidents along the way added to the mystery of making art. It was a wonderful week. Thank you all for being such a great class, for working so hard, for making it fun to be with other artists. The hardest part for me is always saying "goodbye" at the end.


Linda Lyons - 12" square circle design

DeeAnne Helm - Harbor batik


Emily Hostetter - City lights


Sondra Karipides - Daisies


Kathy Storrie - Venice


Sarajane Steinecker - 12" square leaf design


Irene Friedman - 12" square design


Jenny Koch - 12" square design


Amber Michaels - Portraits with collage


Andrea Stewart
- 12" design

7/9/09

BATIK CLASS AT MIAMI U

Here are some more of the exquisite batiks created last week in my workshop. When they were completed, some were adhered to white watercolor paper while some were mounted onto a wrapped canvas. All are originals, designed by each artist. More to come in the next post, too. ENJOY!

Sondra Karipides 12" square design


Kathy Storrie - Hands


Andrea Stewart - Fluid design with border


Amber Michael - Drink of water


Sarajane Steinecker - 12" square on Itchimatsu rice paper


Linda Lyons - Non-representational batik mounted on canvas, with embellishments


Irene Friedman - 12" square on Itchimatsu rice paper


Jenny Koch - Lily pads


Emily Hostetter - 12" square on Itchimatsu rice paper


DeeAnne Helm - 12" squares


Anne Bongiovanni - floral batik


That's all until the next post.

7/8/09

BIRTHDAY BOY

Our first grandchild is NINE YEARS old today! So hard to believe. The joy he brings to our lives is awesome. He's such a blessing.

Here are some of the paintings I've painted over the years of him, several of which have been posted before. All are watercolor on Arches or Fabriano, 140#CP. My favorite's of him and his dog.

HAPPY BIRTHDAY, BRANT!!!


7/7/09

NO SLIDE SHOW

After spending lots of hours trying to post a great slide show of last week's Batik Workshop, using Flickr, Picasa, and slide.com, I give up. Nothing worked. Help???!!!???

Nevertheless, here are a few of the fabulous pieces our class painted, using watercolor, sumi ink, and hot wax. More to come.....
First three batiks by - Anne Bongiovanni, (man to right,) Jenny Koch, (nets to left,) Sondra Karipides (landscape with sun)


Fish batik by Andrea Stewart
Circular designs by Emily Hostetter


Porch by DeeAnne Helm


Abstract design by Amber Michael
Abstracted design with border by Sarajane Steinecker


Fruit by Kathy Storrie


Color design by Linda Lyons


Waterfalls batik by Irene Friedman


7/4/09

FIREWORKS

All day long, actually for the past week, we've been hearing the sounds of firecrackers and other fireworks being shot off to help celebrate our nation's 233rd birthday. Fireworks are really tricky to paint with watercolor, so here's my effort for celebrating - a rendition of a gentle evening at the lake with a beautiful red, white, and blue sunset, without fireworks.

This is a very small (for me) watercolor done as a demo many years ago in one of my intermediate classes. With the exception of painting the little duck in after it dried, this landscape took about ten minutes to create.

The focus was to let the water and paint do as much of the work as possible. Using the paint brush to deliver the paint to the paper, then getting out of the way, was the hardest part.

It used to be so like me to want to mess and play and touch up, and it was way too easy to overdo a good thing. But it's so true that watercolor does its best when it's allowed to flow and mingle on its own.

Happy Fourth of July, America!

"CELEBRATION" Transparent Watercolor on 140#CP Arches 11 x 7" COLLECTED

6/25/09

FIVE PAINTINGS


The five paintings above, along with the reference photo, show my slightly different takes from one inspiration. I know that I've completed several more paintings of the same subject - one very dark and somber - one very, very colorful and patchwork quilt looking - and the rest I can't remember. For several years, I didn't take photos of my work, and now I regret that lapse.
All of these have watercolor in them and are more or less in chronological order, with the first one being painted about 15 years ago. It was done using masking tape to protect previously painted areas as I darkened more shapes to build up the painting. The tape's all removed now. It's a technique I continue to use today because I like the batik looking effect it lends to the painting where the paint leaks under the pieces of tape.
The second one is a collage with watercolor, using rice papers to build up texture on the paper. It was easy to create the delicious textures of those old walls with the layers of various rice papers.
The third painting was done on watercolor paper that had a layer of white gesso painted over it first. The paint 'floated' on the gesso-ed surface, drying in irregular ways that helped establish the textures of the walls and street.
The fourth painting began with one good white shape and three 'cool temperature' shapes touching it. The white shape went off the page on three sides, originally, but now is hard to find. The process of using a good white shape initially in the painting was a springboard to help establish a sense of unity and focus in the painting.
The fifth painting is the batik with hot wax that was just posted last week on this blog. Check out that post for more info about how it was done. When I see these five together, I think I really prefer the first one the most. Do you have a favorite? (I still regret having sold that first one.)
You'd think I'd be so tired of this painting by now, but I have plans for another approach --- or two or three dozen. Mike Bailey (click to check it out) has painted one still life over 90 times - so look out. I'm not anywhere close to that yet.
There are so many ways to approach this painting, and the only approach I've used so far is to try different techniques and design processes. I have yet to focus on an element of design as being more important that anything else --- and certainly texture would be the first element I would emphasize. And I haven't yet pushed the picture beyond the confines of realism. That's an aspect begging to be explored. And I don't remember ever painting the scene on YUPO, either. The things that await me in the studio....
But this next week I'll be away from the computer to challenge 15 other artists at Miami University in Oxford, Ohio. We'll be using hot wax, four different rice papers, watercolor paints, fluid acrylics, canvas, and various inks as we explore other ways to create gorgeous batik artwork. It'll be fun to share some of their finished batiks here on my blog when I get back. See ya then.

6/19/09

NOT AGAIN!?!?!?!

One of my favorite subjects is an ancient street in Valetta, Malta, and I've taken lots of artistic license to change it to work for me. I've previously posted several renditions of this same ancient street, painted with various watercolor and collage techniques. This is the first time it's been created with the batik process.

This painting is a wax batik, painted with watercolor on Kinwashi rice paper with sumi ink added for the cracked batik look.

First photo = the painting in progress, along with my wax skillet and old brushes. It's tough to find these little skillets with temperature control, but often, right before school starts, Walgreens, etc, have them in stock for the college kids.

Second photo - all of the painting and waxing process is finished on the kinwashi rice paper. The paper, which is now completely covered with wax, is then heated with a hair dryer to totally soak the wax into the fibers of the paper. Next, it's rolled up and popped into the freezer for a few seconds to make it easy to 'crack.'

After cracking the wax over a trash can, pinching some of the areas to create deeper cracks, it looks like a disaster, as shown here. Lots of chunks of wax fall off during the cracking process. Most of the dark shapes at the corners of this photo are shadows on the crinkled paper, not dark paint. Since the paper tears easily, this step was done very carefully.

Third photo = diluted sumi ink has been applied by pouring it over the cracked, waxed paper and jostling it into the cracks.

After blotting off the excess ink, making sure to not rub it into the wax, I gently sprayed water onto the inked painting (while it was hanging over the sink) to help remove more of the ink. This results in a softer, 'grayed tone' to the inked cracks, rather than such a strong, black effect.

Fourth photo = all wax has been ironed off, and the rice paper is smooth and flat again. Overall, I like the painting, but it's so, so, so warm. A bit of cool color relief would be nice somewhere in all those oranges and reds.

It's ready to glue down - to be done before I add any cooler colors to the painting, although the corrective painting could have been done before gluing it down as long as enough of the wax had been removed with the hot iron. Adding paint without compromising the integrity of the batik effect is a major key to keeping this a successful painting.

Methyl cellulose wallpaper paste, applied liberally to really white watercolor paper, works well to secure the painting permanently. However, I was so intent on pasting this really large batik down without messing it up ..... and ended up pasting it down wrong side up! (The wrong side of the batik is similar but the other side was better with more clarity to the shapes and colors.) Rats! Now there will be even more corrections to make, since once it was embedded in the paste, it would have undoubtedly torn too much if I had tried to remove it.

Fifth photo = The finished, corrected painting, backwards, of course. Cool colors of blues, teals, and purples have been added, using both a Pat Dews' atomizer as well as a one inch flat brush, to adjust the outer edges of the painting. I like the warm focus now on the street and the center of the walls, enhanced by the cooler temperatures at the edges.

Last photo = original reference photo/inspiration with many artistic liberties taken.

"ANCIENT WALLS - MORNING LIGHT" Transparent Watercolor and Sumi Ink on Kinwashi Rice Paper, adhered to 140#CP Arches, 25 x 35"


6/11/09

PARKING THE BIKES

After a couple of months of contemplation and experimentation, I'm hoping that this painting can be parked for good. It's been posted before when it was in Stage One and Stage Two - see last two paintings below.

Once it got to Stage Three - next pix below - I felt it was ok, but when I added the lavender to one of the bikes - top painting shown here to the right - I thought it could be done. I really liked it at Stage One, but not at all at Stage Two - too dark and dreary for happy bikes.

"BIKE RIDE HOME" Transparent Watercolor on Yupo 26 x 18"

Comments? Critique? Ideas? It's watercolor on YUPO so adjustments are totally easy.

Stage Three - almost done - cropped a little at the top but needs an element of surprise


Stage Two - too many darks - confusing and ominous???


Stage One - Light and airy, lots of texture, weaker composition but maybe more fascinating?


6/9/09

REVISED PHOTO

The last post was way, way off on color and darkness. The post here shows the painting more accurately, I hope, though it's a little bit 'pinkish.' The temperature of the painting is very warm, orange-reddish...

After retaking the photo of the painting, I tried to adjust the results on my new Photoshop program to get it to match the painting as closely as possible. The last post of it (below) looks too green and light. I'm never sure how to set my camera to get the most accurate colors. Hope you don't mind seeing it AGAIN! It's also renamed - and I find that naming a painting is either really easy or else ridiculously impossible. This is one of those impossible to be original times.

"EVENING RIDE" Fluid Acrylics on YUPO 26 x 20"

6/7/09

TWO DAY WORKSHOP FOR ARTISTS

If you love textures and gorgeous colors..... if you want to paint without fear of failure..... even if you can't draw and want to paint...... there's a workshop coming up this August that you just might want to check out.

At this workshop, you'll learn more about how to create your own great art on YUPO. I'll be teaching a two day workshop the last weekend of August, August 29 & 30, to be held near Cincinnati, Ohio, in my Indiana teaching studio and will include a vast array of painting possibilities for the slick YUPO surface.

The sky is the limit on what subject matter to paint --- abstract, experimental, realistic, landscapes, portraits, still lifes, wildlife....... anything goes, your choice! Mistakes can easily be fixed on this wonderful painting surface, and happy accidents make the journey even more exciting.

Both Transparent Watercolor and Fluid Acrylics may be used, with techniques being presented using both of these mediums. Cost will be $140 for the two full days of instruction.

For more information, please contact me at sandymaudlin@gmail.com . Class size will be limited, and a $50 down payment will hold your place in class, with the balance due on August first. Hope to see many of you at the workshop! It WILL be fun. Be sure to sign up SOON!

The YUPO painting here was created using Fluid Acrylics, applied like watercolor and demo-ed at the Middletown Arts Center Workshop in Ohio this past April. The second picture shows how it looked when the demo was done, before I went back to my studio to add more details to the painting. I'm still thinking about whether to crop it or not.

"More than Grand" Fluid Acrylics on YUPO 26 x 18"

6/6/09

YUPO ARTISTS

Our YUPO workshop in Middletown involved a week of learning, exploring, and creating beautiful work on the slick YUPO surface. People from the Dayton, Ohio, area as well as artists from Indiana, Michigan and Alabama enjoyed some pretty intense and exhausting days but all thought it was well worth the effort.

I've posted only a few of the paintings from the workshop artists here for your enjoyment. In all my computer changes last month, I've misplaced all the other artists' work but still hope to find them. All are watercolor.
ABOVE - Work in Progress on YUPO by Dot Holdren
ABOVE - Completed masterpiece by Joan Givens - PEGGY'S COVE
ABOVE - Completed masterpiece by Shirlee Bauer - done with orange undercoating ABOVE - Work in progress by Sue Barnhart

Most artists in the workshop began at least three paintings during the week as they discovered many techniques in handling watercolor on YUPO. We also worked with fluid acrylics on YUPO.

I'll be posting info soon about three and four day YUPO workshops that I'll be teaching here at my studio soon. Plans are also in the works for holding a BATIK BASH Workshop to help artists explore that unusual process, too.

6/3/09

VENICE on YUPO

This painting was one of the demos done at a YUPO workshop I taught this past April. The challenge was to begin the painting with one good white shape that was unpredictable, irregular, and had diagonal movement, and which took up less than a third of the whole paper. Everything around that shape was painted with a combination of cool, pale colors first. Next, some small warm darks were added.

From that point on, the painting was developed by interrupting that original white shape and painting in the dark and medium valued shapes. Much of the original white shape was obscured at this point.

This approach to painting takes some advanced planning, but it continues to amaze me how easily the painting falls together when done this way. The sense of unity in the painting is greatly enhanced because of the preliminary planning with the original good white shape.

I had plans to post some of the workshoppers' paintings but have somehow misplaced my photos of several of the finished paintings. I'll post what I do have later this week, even though some are works in progress.

"GONDOLIER" Transparent Watercolor on YUPO 20 x 26"

5/30/09

STEP BY STEP

Today's post shows the step by step process of yesterday's batik post.


First photo - Finished batik on Kinwashi rice paper


Second photo - First layer of hot wax (Gulf paraffin, not bees wax) and watercolor... wax is only painted on the whitest shapes in the painting to preserve them, (similar to painting miskit to preserve the whites.) The first 'wash' is supposed to be only one value, using several colors, randomly placed for the most part.


Third photo - you can see the pale, second wash on top of the second layer of wax, carefully applied to the shapes that need to be very light, like the inside rim of the sun. Next, (fourth photo) the batik is hanging to dry after another layer of waxing and paint. A fan helps it dry faster, but don't use a hair dryer or the heat will melt the wax, making it spread into weird blobs.


The next step (fifth photo) shows the value differences even better with the fourth layer of wax applied to all shapes that need to be preserved for that value. Again, colors were more or less randomly washed on, and my focus was to keep the painting warm at this point. Only a few cool colors were touched in, but still about the same value for each wash.


The process continues... painting hot wax to cover the shapes which must remain the value of the previous wash. Follow up by painting over the whole page to darken one value darker, using mostly random colors. Dry and repeat until all the shapes are covered with wax except for the darkest shapes.


The step below shows the next to the last wash over a mostly waxed sheet of paper. At this point, I changed to strong, cool colors to make a good contrast with the earlier warms.

The wax makes the paint under it look a little darker. The edges of the unpainted ends of the Kinwashi paper show on both sides.

I added one more really dark wash for the darkest darks, then let it dry. When the batik was completely dry, I waxed all the remaining shapes, so that the whole paper was completely covered with wax.


Below, the 34 x 26" completely waxed paper has been crunched up and wrinkled, breaking the wax surface so that diluted Sumi ink can be applied to seep down into the cracks to create the traditional batik effect. The white jagged lines in the photo are actually the cracked paraffin. This is the really messy part, and I forgot to take photos of the inking and ironing.


The final photo below shows the full size of the painting before it was glued to the wrapped canvas. Two inches wrapped along each side of the canvas, creating a finished look.

The wax was ironed off the Kinwashi paper right after the inking was completed. I glued the Kinwashi down over a generous layer of acrylic matte medium on the canvas then left it to dry overnight. Often, there are tears in the paper which are easy to repair during the gluing down process.


Later, I added a thicker, dark border around the bird area, using fluid acrylics. Watercolor would've worked too, but would have been more difficult to use on the previously waxed surface. (See finished pix at top of post.)

5/28/09

BATIK AGAIN

Batik on rice paper, using watercolors instead of dyes, can result in some really cool artwork. This batik, finished earlier this month, will hang in the gallery at Miami University in Oxford, Ohio, during their summer courses. The detail of the painting is shown here, with the whole painting below.

Sue B, one of my special artist friends from North Carolina, told me how to mount a batik painted on rice paper onto a wrapped canvas. She'd learned the batik process years ago during one of my workshops on the North Carolina coast and is now selling her beautifully designed batiks in a gallery near her hometown:-) This painting wraps around the sides of the canvas and looks finished as is - no framing needed. Several layers of special varnish are applied to protect the surface to be as durable as an oil painting.

At the end of June, I'll be teaching another Batik Workshop at Miami, and there only a couple of openings left in the class, in case you're interested. Artists in my weekly classes have also been creating exquisite batiks for the past six weeks. It's messy, fun, intriguing, unpredictable, and requires some serious planning sometimes.... but so worth the results.

To see the first "CAWS" painting in this series, called CAWS FOR ALARM, go here. Sue bought that painting several years ago, and I loved getting to visit it. This series started as a message about East Nile Virus, which was killing birds in our area, as well as infecting people through mosquito bites. Since I loved the shapes the birds created, I began a series springing off of that first, large YUPO painting. More to come in the future.

"A CAWS FOR CONCERN" Transparent Watercolor & Sumi Ink on Kinwashi - 28 x 22" Wrapped Canvas

5/26/09

UPSIDE DOWN

One of Chris Beck's recent blog posts wisely proclaimed 'CROP TIL YOU DROP' as a great solution for some paintings. She and Pablo Villicana Lara were more or less challenging each other to 'find' a better painting within a bigger one. Their solutions are eye candy.

My azalea painting shown here on the right is one of those that really needs to be cropped to work better. The center of the painting is boring, but the left hand edge I really like. Turning that section upside down makes for a better painting. My experimental crop is below, shown flipped upside down from the original.

This bouquet of azaleas is an old, old painting from the archives which was framed as is. After reading Pablo and Chris's fabulous quote, I'm sure it must be unframed, rematted, and reframed. Maybe the top needs to be cropped off a little more.

Thanks Chris, and Pablo, for your wisdom and inspiration. I always enjoy visiting your blogs, learning much from what you so freely share.

This could be called Cherry Blossoms?????


5/25/09

MEMORIALS

Memorial Day in America helps us pause to remember the importance and cost of freedom. It's too easy to take for granted what so many have given their lives for.

This painting was created over a decade ago to depict a small town near us that's nicknamed 'the City of Spires.' It's a small river town right on the Ohio River that is delightful and quaint, very much a representation of mid America. There's plenty there to inspire a plein aire painter, for sure.

Thanks to so many, we enjoy a life of freedom in a wonderful land. Thank you, thank you, thank you.

"AURORA" Transparent Watercolor on 140#CP Arches, 20 x 14" COLLECTED

5/21/09

PERFECT DAY

Today's another perfect spring day.... no time to blog. This painting was created maybe ten years ago of a creek near us called Muddy Creek. The creek's small, and the painting's small and was quickly painted. Enjoy your world today and be creative!

"GLORIOUS DAY" Transparent Watercolor on 140# Arches 6 x 9" COLLECTED

5/19/09

YOUNG ARTISTS

Most of yesterday included building great memories and hopefully encouraging and inspiring about 70 young artists to enjoy art. Last week, I'd rigged up homemade palettes from styrofoam meat trays (THANK YOU, Krogers,) then filled each with American Journey watercolors purchased from Cheap Joes.

Along with the palettes, I'd packed brushes, lots of Fabriano Artistico paper cut into fourths, water containers, small sponges, some salt, and a half a credit card for each child to use. My destination was an elementary school in northern Indiana, four hours from my studio.
Earlier this year, one of our grangdaughters, Paige, explained to her kindergarten teacher that her grandma was a 'real' artist, so her teacher had asked if I could come to class and show them what I did. Paige was so excited, and her painting (shown here) is a beautiful portrait in progress - of me!

In the second grade class, a couple of the boys said they'd rather continue painting than have to stop and go to gym class. I figure that's about the best possible endorsement for the joy that art can bring to a child's life. The day was priceless to me.

The creativeness was awesome in each room with the finished paintings so varied and expressive. That good looking boy (I'm not biased even though we're related) running toward me and my camera was returning supplies that were left in his room earlier and was one of my great helpers yesterday. It was so worth doing, and I hope we get to do this again next year.

5/15/09

FOCUS

Rhonda Carpenter's newest paintings of flamingos shows how well she incorporates various hot colors to define the birds - see her blog here. Many, many, many moons ago, I painted this fancy flamingo as a class demo to show how to achieve the look of feathers as well as how to make the most of contrast.

Planning ahead to allow the darkest darks to be next to the lightest lights in a painting is one of the easiest ways to make a stronger focal point to draw the eye. Hard edges also get the most attention - compared to soft or lost edges, as do diagonal lines, compared to horizontal or vertical ones.

Small shapes make the eye stop and look. Strong color temperature change - warm vs. cool - is another effective tool to incorporate in the focal area. Even using pure colors next to slightly grayed ones makes the pure color get much more attention.

Any type of contrast always makes us notice and keeps our interest. It's fun to take advantage of that principle to make a painting more effective, more exciting for the viewer to look at.

"STRUTTING HER STUFF" Transparent Watercolor on 140#CP Arches 13 x 20" COLLECTED

5/13/09

AN OLD ROSE

This rose, a Queen Elizabeth Grandiflora, was painted lots of years ago as a demo for an intermediate level class I was teaching. Back then, I'd provide the drawing for everyone to trace before we began painting. Then, I'd show them where to miskit, how to glaze, when to paint wet-in-wet, etc. Most all the paintings would turn out really nice, but because of following the process of painting along with 'teacher,' the artists seldom ventured out of the nest to create their own work.

It's tough painting without guaranteed results, but working a painting from the initial start up 'idea' stage through to completion is really what it's all about. The reward of creating a painting from your own heart and head is so worth the struggle. Now that's the only way my classes operate.

The success rate may be lower, but the overall growth is MUCH stronger for each artist as they learn and discover how to unfold what they want to say with paint. Somehow, there's actually less whining now than there was when people traced and followed along in years past. Surprise!

Newer work will be posted as soon as I have an operating photoshop program. I have yet to find my Adobe program, but hopefully, it may be in the bank's lockbox.

"ONLY A ROSE" Transparent Watercolor on 140#CP Fabriano Artistico 15 x 11" COLLECTED

5/11/09

LONG STORY

The computer is pretty much okay now, but there's lots to adjust - and find. Plus, I can't use Adobe Photoshop yet. Bummer.

Here's another painting created quite a few years ago of one of my favorite animals. She was quite a beauty that day at the Colorado Rocky Mountain Zoo. While painting her, I used lots of teal, turquoise, blue, red, coral, purple, and yellows, but no browns, for the fur.

I do hope to post fresh work soon, along with the paintings from the YUPO workshop last month. It's good to have a working computer again:-D

"LONG STORY" Transparent Watercolor on 140# CP Fabriano Artistico 14 x 22" COLLECTED

5/5/09

BAD

Our computer's hard drive is BAD! Being 'bad' used to be good. But this is bad, so no new posts from me until we have a brand new GOOD hard drive..... very soon, I hope. The photo of this painting was saved and ready to go so here I am at our library on their computer writing it up.

The painting is years old - like nearly 20 years old, painted in the Rocky Mountains back when I thought I had to be a plein aire painter to be an artist. Yet, one of the best things about plein aire painting is the memory cache that's created while the painting's being done ------ the guys who stopped by to tell me their aunt could really paint lilacs ... the great little outside restaurant with tables and comfortable chairs where I sketched while waiting for my lunch ... the gorgeous drive up through Thompson Canyon to get to the little town of Evergreen... the ferns and fog that graced the steep rocky walls along the road. Each time I see a photo of this painting, I remember so much of that day. Plein aire painting DOES have some wonderful benefits.

I hope to be up and running on line soon with some great posts from last week's YUPO workshop in Middletown, Ohio. And, I'll finally be able to catch up on all the blogs I've missed. See you then.

"THISTLES AND RUST" Transparent Watercolor on 140# Arches, maybe 15 x 11" COLLECTED

4/29/09

YUPO AND FEATHERS

This is yet another one of my early paintings on YUPO. The rich colors of this rooster and the textures of the wood behind these birds begged to be painted on the super slick YUPO paper.

This week we're enjoying a wonderful worshop in Middletown, Ohio at the Middletown Arts Center, so all my posts will be about YUPO paintings from my archives. (The post shown here does seem somewhat faded compared to the original painting.) The wood was so so so easy to paint because of the way the paint slid around on the paper and because of how easily paint could be lifted for highlights.

Next week I hope to post what the artists in my workshop painted. One of the joys of teaching workshops is learning so much from each of the artists who are exploring their own art journeys. But, saying 'Goodbye' on the last day is the hardest part of teaching for me.

"BLACK TIE AFFAIR" Transparent Watercolor on YUPO 25 x 19"

4/27/09

YUPO & TEXTURES

This week at our workshop, I'll be teaching how to use as many approaches as possible on YUPO. This gull was one of the first paintings I did on this slick surface - done about 9 years ago.

The juiciness of the paint being affected by gravity, especially as seen in the rocky areas in this painting, was one of the hardest things to learn to take advantage of. Being a control freak, I found that the possibilities on YUPO helped me let go and enjoy the process of painting a lot more. I soon realized that YUPO and textures go together wonderfully and just love the way the colors stay so intensely vibrant on this non absorbent paper.

Although I now seldom take advantage of the juiciness aspect of paint on YUPO, I still totally LOVE working with either watercolor or fluid acrylics on this unusual surface. If you haven't tried YUPO yet, be brave. You can wash off your watercolor mistakes easily and start all over if you need to. Good luck.

"MAINE GULL" Transparent Watercolor on YUPO 14 x 11" COLLECTED

4/24/09

COUSINS

Painting on gessoed watercolor paper is a close cousin to painting on YUPO paper. These geraniums were fun to paint on the gessoed surface, but their clay pots were even more fun. The paint seems to sit on top of the gesso, and the colors mingled with each other before they dried.

Texture can be easily played up on the gesso (click on the photo to see the textures enlarged,) just like it can on the YUPO surface. Next week a group of artists will be exploring how to paint creatively on YUPO at the Middletown Arts Center. Their facility is tops, and I'm looking forward to teaching, as well as learning, from all the artists in my workshop. I plan to post some of their paintings when I return. It will be a good week.

"OUT OF THE POTTING SHED" Transparent Watercolor on 140#CP Fabriano Covered with White Gesso, 21 x 14"

4/20/09

STUDIO OR PLEIN AIRE?

After really liking the painting I did outdoors in the midst of our flower gardens, (see the last blog post here) and after selling that painting when I really didn't want to part with it, I decided to 'paint it again.' This time I painted it in the studio, relying on memory and imagination.

By using the same techniques and colors, the results were similar. Yet, the first painting, though not as carefully planned, seemed to have more 'life' in it, more emotional impact.... a result of plein aire painting, responding to the moment, painting from life??? Maybe.

I do love these flowers in the spring, and there's a second variety that blooms in the fall, too. The way they swing and sway in the breeze is absolutely poetic.

If I'm ever inspired to paint them again, I think I'd want to have a bouquet right in front of me. Something's gained in the painting by from life whenever it's possible.

Second best is painting from photos that inspired me when I took them. The trick is to remember why I wanted to take the photo in the first place and then leave nearly everything else out.

"ANEMONES" Transparent Watercolor on 140#CP Arches 12 x 9" COLLECTED

4/16/09

EARLY WORK

Here's a painting done plein aire in our old backyard in Kokomo. I grew everything possible - hundreds of varieties of perennials and exotic, unusual dwarf plants. We had no deer to eat our garden like we do here, and the soil was not such a hard packed clay.

These windflowers or anemones danced gracefully in the breeze that May day and begged to be painted. I was a fairly new watercolorist and had to touch up a spot or two with white gouache... should've planned ahead better or used miskit.

"WINDFLOWERS" Transparent Watercolor on 140# Arches about 10 x 7" COLLECTED

4/14/09

NICK SIMMONS WORKSHOP HERE

Artist Nicholas Simmons will be teaching a workshop here at my studio next August, SIXTEEN months away, but I wanted to let anyone know who's interested. Check out his work here with fluid acrylics. He uses them JUST LIKE TRANSPARENT WATERCOLOR, taking advantage of the fact that once they're dry, they're immovable, but while they're drying, they're partially removable. Nick's results are stunning and have been compared to a batik look.

In 2007, Nick was here to give a workshop, right after he won the National Watercolor Society's GOLD MEDAL. We learned so much and had a blast.

Next August, Nick will present a fabulous four day workshop from August 6 - 9, 2010, a Friday through a Monday, here near Cincinnati, Ohio. Cost is $400, and a non-refundable down payment of $50 holds your place in class. He is an excellent instructor who has the expertise to teach, motivate, encourage, and critique.

Contact me for my mailing address at sandymaudlin@gmail.com if you have questions or want to sign up. Nick's workshop will fill up very, very fast so don't delay. And if you can't get here to southeastern Indiana for the workshop, make every effort to find another NICHOLAS SIMMONS workshop to attend. You'll be so glad you did.

4/13/09

MY ARTISTS

Saturday we dyed 18 Easter eggs. Aren't they gorgeous! Sunday morning before church, the artistic Easter egg dying crew was ready to go on an Easter egg hunt. And aren't THEY gorgeous!!! Three 5 year olds, one 8 year old. We had a blast.


Two eggs are missing??? Maybe they'll show up soon. The kids found over 70 hidden eggs with treasures in them. Busy bunny. Happy Grandma:-D

4/10/09

POWER POINT

Only once many years ago did I paint a picture for a themed-based show. Our paintings had to be inspired by a specific, old country church, and one artist painted the outhouse behind the church..... inspiration with humor.

After taking lots of photos through darkened windows of the pews and altar, I found my real inspiration in this light meter. Since I like mechanical things anyway, painting this was just goofy fun. I changed up some of the lettering to be more meaningful to me, like the Greek letters of Alpha and Omega. Many of the letters or numbers are backwards, some reversed as a mirror image or upside down, so that the real meaning of POWER SURGE is more subtle. All the numbers or letters spell out words in about a dozen different areas creating a message regarding things important to my beliefs.

I did learn a good personal lesson - to not ever again paint for a themed show. If I have something that will work, that's fine, but it's not in me to 'make a painting happen' based on a show's agenda. In the same way, this line of thought may also have something to do with why I seldom ever accept commissions, except for dogs.

I'm posting this because it's Easter weekend - my favorite Sunday of the year and favorite holiday. I wish a very Happy Easter to everyone.

"POWER POINT" Transparent Watercolor on YUPO 12 x 19"

4/7/09

GRATE ART

This painting is a result of my love of taking photos of what's under my feet. In Italy and Switzerland, I was fascinated with the grates in the walkways and streets and decided they all had to be incorporated into one painting.

Created on YUPO with fluid acrylics, this painting was my favorite one I did during the last couple of days of independent study at our North Carolina workshop.

The past four days here have been jam packed with instruction from an AWS artist, Janet Rogers. This morning's class enjoyed watching her paint a beautiful bouquet of roses, then Rhonda drove her to the airport. Next, Janet and her husband, Steve, are teaching in Key West. It was a very special weekend.

"MORE GRATE ART!" Fluid Acrylics on YUPO 20 x 26"

4/3/09

STAGE TWO

As promised, here's the next phase of this painting. There's quite a bit more to do to pull the composition together. I don't care for the browns too much and must adjust the shapes the darks make. I actually liked this painting better in yesterday's post but knew it wasn't that strong yet to be finished, so I'm pushing it around a lot.

The idea is to create the feeling of 'sooo many bikes everywhere.' Not sure when I'll find the solution, but when it happens, it'll be posted. It's great fun to explore a painting and see what shows up, and since this is on YUPO, just about anything can change. We'll see........ it's a journey worth taking!

4/2/09

FIRST DAY

This is a work in progress from the workshop. Our instructor talked every morning for two hours, then gave an assignment we could chose to do or not. In workshops, I'm more of an 'or not' kind of person, so I went my own way, trying to implement some of the points Miles had made in my choice of painting.

This is what I started, based on a trip to Amsterdam, where they have two story parking garages just for bikes. I'll post the next phase of the picture tomorrow so you can see how it's changed. This is transparent watercolor on YUPO.

3/31/09

WORKSHOP

The past week, actually seven full days, was spent painting in a beautiful wooded area on a small lake in the Blue Ridge Mountains of North Carolina. It was very special, living in a cabin with a wood burning fireplace, eating meals each day with 300 other artists, and enjoying the creative energies that flowed there at Kanuga. This was my tenth year at Kanuga, and next year we'll be celebrating the 25th anniversary of watercolor/watermedia workshops there.

Mike Bailey from California flew in for the week and did a watercolor demo for the whole group on Monday evening. Next year, he'll be one of the instructors at Kanuga.

This August, future participants will select their instructor for 2010, choosing from twelve unique artists. Nick Simmons will also be one of our instructors, teaching how he uses fluid acrylics. You can check out all the teachers here. Be sure to email them to send you the info and registration before August if you're interested in attending. The classes fill up very fast.

Miles Batt added four days worth of art instruction to my brain, but it's not all soaked in yet. He's amazing. AMAZING. Should be a National Treasure. He's brilliant and way beyond most artists' thinking, including mine. It was tough to keep up with him, and I don't think many people will ever be able to figure out how he thinks. So creative!

The last two days of the workshop, we enjoyed being with a smaller sized group of artists painting on our own, with individual consultations from a couple of well respected professional artists, Carrie Burns Brown and Linda Baker. Their guidance will make a good difference in my future work. Linda will also be one of the instructors next year. Next year's line up of teachers is really good.

Soon, I hope to post some of my work painted during the week. One of my paintings was a throw away, one very mundane, a couple are ok, but there's one that I am absolutely nuts about.

The little green cabin was where our classroom was. Hollies with brilliant red berries were growing wild everywhere, and the huge weeping cherry was in full bloom. We had a great facility and excellent lighting and work areas.

For people who don't want to 'rough' it in the cabins (kind of like church camp,) there is a lodge with hotel-like rooms, too. Did I mention that the food was great? And no kitchen clean up. We were spoiled. Looking forward to next year already....


3/23/09

GRATE ART

This small painting was inspired by an old broken grate outside a hardware store. It was painted on location, which means I did not have the comforts of my studio.

Created on YUPO paper lots of years ago, the best part of the painting is its title. I did enjoy painting something so mundane as a broken grate on an old sidewalk. It's sometimes very fascinating to inspect things we see - or don't really see - everyday.

This will be the only post this week since I'll be at a watercolor workshop in beautiful North Carolina for the week. Looking forward to catching up with everyones blogs when I get back.

"GRATE ART'S NOT ALL IT'S CRACKED UP TO BE" Transparent Watercolor on medium weight YUPO 6 x 4"

3/22/09

HOPE

This home's old window is another that I've painted several times. Located on a narrow, busy street in New Hope, Pennsylvania, it represents the charm of Buck County, and its history dates back to Revolutionary times.

I like that I can see all the way through the house and out the distant window. Each time I paint it, the hanging light gets changed, as does the flower box.

This particular painting of the window reminds me of a friend, and even of the house she lived in. She was classic, grabbing life with so much gusto. An eternal optimist, Pat Taylor had an incredibly amazing way of finding good about everything that happened. She knew how to grab life and make the most of it.

The things she valued really mattered, like family and friends. She LOVED to draw and so enjoyed painting.

Like this house, Pat seemed to have beautiful windows to look into and find unexpected treasures. She was transparent, generous, kind, trustworthy, fiercely loyal, and a very good artist. She knew how to change the things she could change and accept the ones she couldn't.

PAT TAYLOR, I will miss you. We all will. I'm so very thankful you were in my life. You made a difference in so so so many ways and were so loved!

3/20/09

SPRING

Ahhhhhhh... The first day of spring is here! Pansies are blooming in the hanging basket outside the studio, and so far the squirrels have only dug them up once.

Why in the world does this little still life of last year's pansies have an apple core in it? .....must've been desperate for something to put there.

So glad spring's here. We had a light rain last night that smelled so fresh and clean. Our daffodils and magnolia are blooming, too. Hope you all enjoy the weekend!

"PRANCING" Transparent Watercolor on 140#CP Arches, 15 x 11" COLLECTED

3/19/09

LEFTOVERS

This very small painting came from the leftovers from the bubble print which began as a tree line - being the leftover from the other half of yesterday's post. This section of that print is only about postcard size. The original bubble texture that remains in the light bar in this finished abstract shows off the textures formed from the colored bubbles.

The top of the trees shown cut off here - now the new leftover -really doesn't have any area that makes me want to design a painting. It will be saved for a part of a future collage, but I posted it above the new abstract so you could see where it came from.

The compressed design of this abstract is one of the many things that Gerald Brommer teaches in one of his excellent workshops. The idea is that the narrow band of color and texture at the top of the painting presses down. The larger shape at the bottom also seems to exert pressure up. The thin band in the middle seems compressed and becomes the focal point of the painting. Allowing the bubbles to show clearly there helps make a surprise for the viewer. I do like how the bubbles remained in many other areas, too, adding subtle textures that could not be painted with a brush.

"MOULDED" Fluid Acrylic Bubbles with Transparent Watercolor, Conte Crayons, & Caran d'Ache Crayons on 140#HP Arches 5 x 8"

3/18/09

TO SAVE OR NOT TO SAVE?

Three weeks ago, this started out as a bubble print. It was not at all what I'd envisioned so I darkened the background hoping to save it. It looked worse, as you can see here.

Still hoping to salvage something, I headed to the sink to wash off whatever would come loose. I knew most of the bubbles would stay since they were acrylic, but I figured I'd loose that precious white paper in the process. After running water over it for quite a while, I rubbed off as much paint as I could with my fingertips and a sponge.

The results were a softer but paler picture that had no impact and looked really wimpy. When all else fails, it's time to crop.

Below you can see how the painting has been cropped off of the left hand side of the original. The paper was still a bit damp from all that scrubbing, so I used my version of Nicholas Simmon's sewing machine stitch - kind of hoping the old adage would be true - a stitch in time ... It helped. I continued by adding some more detail, a few birch branches, and some splatters.

While it's a huge improvement over the intial attempt, it does look more like a pastel than a watercolor. The finished piece is only an eighth of a sheet of paper.

The last pix here is an upclose of the details so you can see the bubbled textures on the trunk. The other half of that painting was my next challenge, and you'll see it in the tomorrow's post.
Several people have emailed me about the details of bubble print making so here's one of my responses back. It's a little wordy but gives more info about this process.

Mixing up the bubbles - I use those almost disposable plastic Glad containers that are big squares or rectangles, the shallower the better. In each one, I put in 6 oz. water, 3 oz. clear Dawn dishwashing soap, and 2 oz. fluid acrylics (or craft acrylics - just use a bit more or test the color to see how dark it'll be.) Mix really well, and plan to re-stir right before blowing the bubbles since the paint settles on the bottom.

Use hot press watercolor paper if you have it, but any w/c surface will do. With the paper beside you, blow into the freshly stirred bubble mixture until the bubbles reach over the top of the container. I often tip the container so I have more water to blow into. As soon as the bubbles are stacked high, place your paper down into the top layer or so of bubbles. Some of the best prints come from just pressing into a few bubbles rather than pushing the paper far down into the stack of bubbles. (You have less than 15 seconds from when the bubbles are blown to get a good print of bubbles, before the color starts to fade.) Lift straight back up, trying not to move the paper from side to side while it's touching the bubbles. Then, blow more bubbles since those are already loosing their color. Repeat with new bubbles and new colors as much as you want. Printing more bubbles into wet bubbles can create some neat effects if you're lucky.

Then the hard part is deciding how to use the bubble printed surface in a painting. Some 'look' for an image - which is hardly ever successful - usually looks too contrived. Others consider things that are curvilinear which will lend themselves to the surface texture of the bubbles. There's no limit to what will work - so stretch your imagination. The bubbles create a wonderful surprising texture to whatever part of the painting you don't repaint, and they still show through where darker paint is added. It's actually super easy to do this, and I keep the bubble solution sealed up in the containers for a month or so to re-use. Good luck and have fun.